Azure Application Insights

Azure Application Insights: Analytics

I found one more feature of Azure Application Insights I wanted to point out before changing subjects. If you are just joining it might be worth checking out the previous entries in this series.

Add Application Insights to an Existing ASP.NET Core Application
Azure Application Insights Overview

Analytics

On the overview of your Application Insights resource click on theĀ Analytics button.

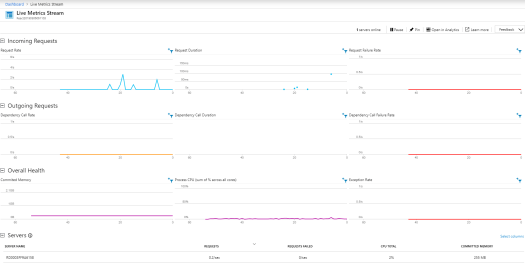
This will take you to a page that will let you query your Application Insight data. The following is the page you will see with one of the example queries and the results it provides.

The official docs for Analytics provide a lot of good resources and I recommend checking them out. We are going to do some exploration in this post, but this post won’t be enough to fully explorer all you can accomplish with Analytics.

If you want to explore Analytics and you don’t have a site up yet or your site doesn’t have much data, like my sample application, check out the Analytics Playground provided by Microsoft.

Schema

Analytics provides a very powerful way to query for information about your application. The first thing I recommend you doing is exploring the schema of the data available. The left side of the page provides the details of the schema that is available. As you can see in the screenshot below you can query details from traces, page views, request, performance counts just to call out a few. Each type has its own set of fields available.

Query Entry

The query entry area is in the top center of the page. You can read up on the details of the query language here. Thankfully the query editor provides IntelliSense as you can see in the screenshot below.

While the syntax isn’t anything like SQL the data is organized in a way that having SQL experience helped me think about how to explored and relate the data.

Results

Clicking theĀ Run button will execute your query and you will the results in the bottom of the page. As you can see the results default to a time chart based on the render statement in the query above.

The chart type can be changed in the results area. There is also an option to view results in a table view (this is the default view if you don’t have a render statement in your query).

Wrapping Up

It is amazing how many features Application Insights provides. I glad I happened to notice Analytics. If you are using Application Insights take the time and really explore all the features that it provides. You never know when you will find a feature that could up being a critical insight into your application.

Azure Application Insights: Analytics Read More Ā»

Azure Application Insights Overview

In the Add Application Insights to an Existing ASP.NET Core Application post from last week, we got Application Insights up and running. This week my plan was to show off some of the features of Application Insights. It turns out this is hard to do in a meaningful way when your application isn’t getting any usage. While I have next to no data for most of the screenshots I still want to point out some of the areas of Application Insights that seem like they would be very useful.

Sample Application

For the most part, the post linked above is a good starting point with the exception of instead of using a React application I switched out for a Razor Pages application. The following is the command to create a Razor Page application with auth using the .NET CLI.

dotnet new webapp --auth Individual

The reason for this change was to get more items in App Insights since Razor Pages makes a request to the server per page.

Application Dashboard

The first item I recommend you check out is the Application Dashboard. On the Azure Portal select your App Insights resource and at the top clickĀ Application Dashboard.

This link will drop you on a page that will let you see how your application is doing at a glance. This includes everything from Unique sessions and Failed requests to Average I/O rate and Average available memory.

Live Metrics Stream

From your application dashboard or the App Insights menu you if you select Live Metrics Stream you will see real-time information about Incoming Requests, Outgoing Request, Overall Health, and a list of servers your application is running on and some stats about your usage on those servers.

Investigate

As a developer, a lot of the items in the Investigate menu jump out to me as being really helpful.

For example, Failures will give you a graph of failures over your selected timeframe with a list of the failed operations and a summary of the top 3 failed response codes, exception types, and dependency failures. The following screenshot is what it looks like, but my sample application doesn’t have any failures so it may not be super helpful.

The other option I want to point out isĀ Performance which will give you a great summary of how your application is performing with break down by operation. This operation level view is a great place to spot areas in your application that may need some perf work.

Wrapping Up

This post covered a small fraction of the value provided by Application Insights. I encourage you to give the service a try especially if you are running a .NET application and most of the value can be provided without having to make any code changes.

Azure Application Insights Overview Read More Ā»

Add Application Insights to an Existing ASP.NET Core Application

I have been using Azure’s App Service to host the web applications I am playing around with for a few years now. The service makes it simple to get an application hosted. Today I decided to try out Application Insights which is an application performance management (APM) service provided by Azure which integrates very well with App Service. In fact, you can enable Application Insights for your App Service Application without the need to make any code changes.

This post is going to cover using an existing App Service application and enabling Application Insights. This post is assuming that you already have an Azure account. If you don’t you can sign up for a free Azure account.

Sample Application and App Service Creation

In case you don’t have an existing application in Azure App Service here is a quick walkthrough of the application I used for this post. If you have an existing application you can skip to the next section.

From the .NET CLI I used the following command to create aĀ global.json targeting .NET Core 2.2 in the directory the application is being created in. You don’t have to do this step, but I needed it because I have .NET Core 3 preview installed and I wanted this post to target the current production release of .NET Core.

dotnet new globaljson --sdk-version 2.2.105

Next, run the following command to create a new ASP.NET Core application using the React template. Any of the templates are fine so feel free to use a different one as long as it will give you a web application.

dotnet new react

Now open the new project in Visual Studio and right-click on the project file and clickĀ Publish.

SelectĀ App Service and then clickĀ Publish.

The next dialog is all about the setup of your App Service. I took the defaults for the most part, with the exception of theĀ Resource Group which I made sure to create one just for this application to allow for easy clean up later. When you have all your options selected clickĀ Create. Note that there is an option to setup Application Insights from this screen, but we are going to handle this on the Azure side after the fact for this post.

After the deployment is done your application should open up in a browser.

Add Application Insights from the Azure Portal

Now that we have an application running in an Azure App Service we are ready to add in Application Insights. First head to the Azure Portal and selectĀ App Services from the menu.

From your list of App Services select the one you want to add Application Insights to. From the menu select Application Insights. In the details click theĀ Turn on site extension button to update the Application Insights extension if needed.

On the next screen select the Location where you would like the Application Insights deployed. You can tweak what will be instrumented based on the language your application is built in, I just kept the defaults. When all your selections are done clickĀ Apply.

When you click apply, you will get a warning that your site will have to be restarted. For a test application, this isn’t a big deal, but if you are on a production application you might want to do this during a slow period. ClickĀ Yes to continue.

After the process is complete click theĀ View Application Insights data link to view your Application Insights Overview.

The overview will give you a fast overview of how your application is doing with graphs of Failed request, Server response time, Server requests, and Availability.

Wrapping Up

Hopefully, this will help you get going with Application Insights. This post didn’t cover many of the features that Application Insights provides, but should get you set up so you can explore all the features the service provides.

Add Application Insights to an Existing ASP.NET Core Application Read More Ā»