Azure App Service

Azure App Service with On-premises Connection

Imagine you get a new project with the ability to use whatever cloud services you want. You jump at the change and dream up an amazing architecture using Azure. Next, you present your plan to the rest of your team and discover a new requirement of having to use an existing on-premises database.

Does this mean your grand plans are shot? Thankfully not, as Azure has multiple solutions that allow you to connect to your existing on-premises resources to enable hybrid cloud strategies.

In this post, we are going to use one of the options, Hybrid Connections, to connect from a web site hosted in an App Service to an on-premises database.

Sample Application

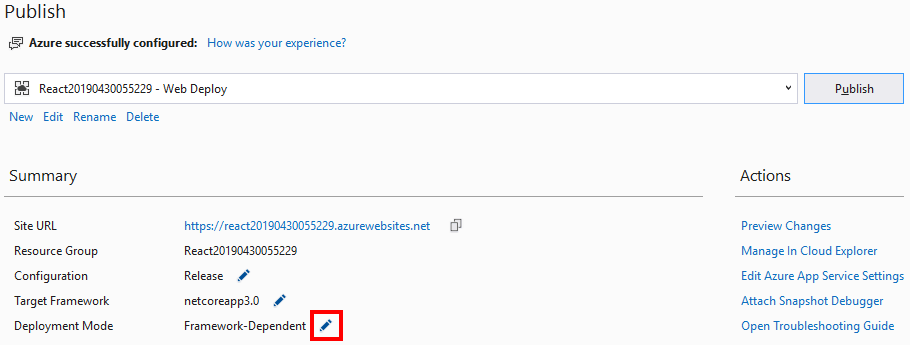
The base sample application we will be using for this post is a new Razor Pages App targeting .NET Core 3. We will walk through actually connecting to the database later in this post. To get started you need the new app created and running in an Azure App Service.

I have multiple walkthroughs of creating a new application and publishing them to Azure so I’m not going to rehash that here. If you need help getting your app created and published to Azure you can check out my Deploying an ASP.NET Core Application to Microsoft Azure post and instead of using the Razor template use the Web App template like the following.

dotnet new webapp

Also, note that Hybrid Connections aren’t available on the free or shared hosting plans so when you are setting up your publish profile avoid those options.

Add a Hybrid Connection to an App Service

From the Azure Portal open the App Serice you created above and under the Settings section of the menu click Networking.

In the networking details, we want to click Configure your hybrid connection endpoints.

I’m going to point out again that Hybrid Connections aren’t available at free and shared scales levels. If your App Service is on a free or shared scale use the Scale up menu option to switch to a scale level that will support Hybrid Connections.

From the Hybrid connections detail page click Download connection manager. When done this will need to be installed on the machine that is running the on-premises database you want to connect to.

Next, click Refresh and then click Add hybrid connection.

Now on the Add hybrid connection page click Create new hybrid connection.

In order to create a new hybrid connection, Azure will require some information. The key parts here are the Endpoint Host which is the name of the machine that is hosting the database you wish to communicate with and the Endpoint Port which will need to be the port that your database is configured to communicate over.

Hybrid Connection Manager on the host machine

Now that the Azure side is configured we need to use the Hybrid Connection Manager application that we installed on the target machine above to allow talk to our App Service.

After opening the Hybrid Connection Manager on the target machine click Add a new Hybrid Connection.

Now Select the Subscription the App Service is a part of. After the list of available connections, loads select the one created above and finally click Save.

After making the above changes my hybrid connection continued to show offline in Azure. After some searching, I found a blog post that suggested restating the Azure Hybrid Connection Manager Service which cleared the problem up for me.

Sample Application Changes to Connect to On-Premises Database

This is a very raw test, but it gets the point across. First, add a reference to the System.Data.SqlClient NuGet package. Next in the Index.cshtml.cs delete the OnGet function and replace it with the following.

public async Task OnGetAsync()
{
    Tables.Clear();
    var connectionString = "data source=Server;initial catalog=master; User Id=User;Password=Password"";
    await using var connection = new SqlConnection(connectionString);
    await connection.OpenAsync();
    await using var command = 
                    new SqlCommand("SELECT name FROM sys.tables", connection);
    await using var reader = command.ExecuteReader();

    while (await reader.ReadAsync())
    {
        Tables.Add(reader["name"].ToString());
    }
}

The above connects to the master database on the specified server and pulls a list of table. Note that you will need to modify the connection string to something valid for your system. It is also important to know that you can’t use integrated security with this setup so you will need to specify a user and password that exists on your SQL Server. Add the following property in the same file.

public List<string> Tables { get; set; } = new List<string>();

Add the following to the bottom of the Index.cshtml which will output the table list we pulled above to the page.

@foreach (var table in Model.Tables)
{
    @table <br/>
}

After the changes are done republish the application to your Azure App Service. After the publish is done your site should show with a list of tables that exist in the master database of your SQL Server.

Wrapping Up

Hybrid connections is a great way to take a workload to the cloud without having to actually move all your data. It is also one of those features of Azure that I had no idea that existed before a week ago.

If you need a lot of hybrid connections look closely at the pricing as the number you can use is tied to what App Service scale you are using. The number of available starts at 5 and can go up to 200 with the more expensive App Service scales.

Azure App Service with On-premises Connection Read More »

Publish a .NET Core Worker Service to Azure

In last week’s post, .NET Core Worker Service, we created a .NET Core Worker Service and then showed how to host it as a Windows Service. This week we will be taking the application created in last week’s post and publishing it to Azure. If you haven’t read last week’s post I recommend you at least get through the application creation bits. Feel free to skip the part about making the application run as a Windows Service since we will be pushing to Azure for this post.

Publish to Azure

This post is going to assume you already have an active Azure account. If not you can sign up for a free Azure account. This post is also going to be using Visual Studio 2019 Preview for the publication process.

In Visual Studio right-click on the project and click Publish.

Since this project already has a folder publish setup from last week’s post my screenshot might look different from yours. Click the New link.

This will launch the Publish profile dialog. We will be publishing to Azure WebJobs using the Create New option. After verifying the settings are correct click Create Profile.

The next screen gets the details of the App Service that will be created. I did a new resource group instead of using the one that was defaulted in and a new hosting plan so that I could utilize the free tier, but both of these changes are optional. When you have everything set click the Create button.

Once create is clicked it takes a couple of minutes to deploy the application. This first deploy is going to be a throwaway for us. There are a few settings we need to tweak to get the application running the way we want. After the initial deployment is complete we end up back on the profile details screen. Click the Edit link.

The Publish Profile Settings dialog will show. Since this was written while .NET Core 3 is still in preview I’m using the Self-contained option for Deployment Mode. If you are doing this after the final release then you can skip this step. The second thing I am changing is the WebJob Type and I’m setting it to Continuous. This is because our Service is controlling its own work schedule and not being triggered by something else. Click Save to commit the changes and return to the publish dialog.

Now push the Publish button to push the application to Azure.

Use Azure Portal to Verify Application is Working

Now that our application is running in Azure how do we verify that it is actually executing as we expect? Since the only thing the sample application does it output some logs we are going to have to find a way to show the output of the logging. To start head over to the Azure Portal. Since we just published the application the resource we are interested in should show in your Recent resources section of the Azure Portal homepage. As you can see in the screenshot the one we are interested in is the first option and matches the name we saw above in Visual Studio. Click on the resource.

From the menu section scroll down to the Monitoring section and click App Service logs. Now turn On the option for Application Logging (Filesystem) and for the Level option select Information since that is the log level our sample application is outputting. Then click Save.

Back in the same Monitoring group of the menu select Log stream.

Wrapping Up

Running a worker in Azure ended up being pretty simple. Not that I’m surprised Microsoft tends to make all their products work well with Azure. I’m sure you will find a way to make a more useful worker than we had in this example.

Publish a .NET Core Worker Service to Azure Read More »

Deploy ASP.NET Core 3 Previews to Azure App Using Extensions

A few weeks ago when the post Deploy ASP.NET Core 3 Previews to Azure App Service I got an email from Jerrie Pelser who pointed out that there are extensions available for App Service that allow usage of the public previews of ASP.NET Core 3 without having to do a self-contained deployment.

In addition to Jerrie’s suggestion pajaybasu pointed out in this Reddit post that using Docker is another option. Pajaybasu also pointed out a line in the original post where I that self-contained deployments were the only option which of course was incorrect.

The first half of this post is going to be the same as the original post which covers the creation and the initial publication to Azure App Service. The last half will cover using an extension to enable the preview version of ASP.NET Core.

Sample Application

I used the following .NET CLI command to create a new ASP.NET Core application using React for its front end.

dotnet new react

After the creation process is complete open the project in Visual Studio. I highly recommend using the Visual Studio 2019 preview release when working with any .NET Core 3 applications.

Publish to App Service

In Visual Studio’s Solution Explorer right click on the project file and select Publish.

Select App Service for the publish target. Here we are creating a new app service. Next, click Publish.

The next dialog if the information about the new App Service that will be created. I took the defaults for the most part. I did create a new resource group for this application to make the resources easier to clean up in the future. I also changed the hosting plan to the free tier. Click Create to continue.

The Error and the Warning

As part of the publishing process, a browser will be opened to the address of the application. When this happens you will see an error about ANCM In-Process Handler Load Failure (if you are using IIS In-Process Hosting).

If you look back at Visual Studio you will see the following warning that your application requires the .NET Core runtime 3.0 and App Service only supports up to 2.2. Since we are going to fix this in App Service I recommend selecting Don’t perform check in the future (only this profile).

Another Fix

For this version of the fix, go to your App Service in the Azure Portal. In the menu under the Development Tools select the Extensions option.

On the next page click the Add button at the top. Click on the Choose Extension and select the ASP.NET Core 3.0 (x86) Runtime option.

Next, click Legal Terms, read the terms and if you are OK with the terms then click the OK button. You will then have to click OK on the add extension blade which will start the extension installation.

If you were to load your site at this point you would still get the 500 error. Under Settings click the Configuration and click on General settings turn Web sockets On and click Save.

At this point, your site should be working. You can also go back and turn web sockets back off and the site will continue working. I have no idea what toggling web sockets does to make everything start working, but thanks to this comment on a GitHub issue for the key to getting this working.

Wrapping Up

Hopefully, between this post and the previous one using a self-contained deployment, you won’t have any issues trying out the .NET Core 3 with App Service.

Deploy ASP.NET Core 3 Previews to Azure App Using Extensions Read More »

Add Application Insights to an Existing ASP.NET Core Application

I have been using Azure’s App Service to host the web applications I am playing around with for a few years now. The service makes it simple to get an application hosted. Today I decided to try out Application Insights which is an application performance management (APM) service provided by Azure which integrates very well with App Service. In fact, you can enable Application Insights for your App Service Application without the need to make any code changes.

This post is going to cover using an existing App Service application and enabling Application Insights. This post is assuming that you already have an Azure account. If you don’t you can sign up for a free Azure account.

Sample Application and App Service Creation

In case you don’t have an existing application in Azure App Service here is a quick walkthrough of the application I used for this post. If you have an existing application you can skip to the next section.

From the .NET CLI I used the following command to create a global.json targeting .NET Core 2.2 in the directory the application is being created in. You don’t have to do this step, but I needed it because I have .NET Core 3 preview installed and I wanted this post to target the current production release of .NET Core.

dotnet new globaljson --sdk-version 2.2.105

Next, run the following command to create a new ASP.NET Core application using the React template. Any of the templates are fine so feel free to use a different one as long as it will give you a web application.

dotnet new react

Now open the new project in Visual Studio and right-click on the project file and click Publish.

Select App Service and then click Publish.

The next dialog is all about the setup of your App Service. I took the defaults for the most part, with the exception of the Resource Group which I made sure to create one just for this application to allow for easy clean up later. When you have all your options selected click Create. Note that there is an option to setup Application Insights from this screen, but we are going to handle this on the Azure side after the fact for this post.

After the deployment is done your application should open up in a browser.

Add Application Insights from the Azure Portal

Now that we have an application running in an Azure App Service we are ready to add in Application Insights. First head to the Azure Portal and select App Services from the menu.

From your list of App Services select the one you want to add Application Insights to. From the menu select Application Insights. In the details click the Turn on site extension button to update the Application Insights extension if needed.

On the next screen select the Location where you would like the Application Insights deployed. You can tweak what will be instrumented based on the language your application is built in, I just kept the defaults. When all your selections are done click Apply.

When you click apply, you will get a warning that your site will have to be restarted. For a test application, this isn’t a big deal, but if you are on a production application you might want to do this during a slow period. Click Yes to continue.

After the process is complete click the View Application Insights data link to view your Application Insights Overview.

The overview will give you a fast overview of how your application is doing with graphs of Failed request, Server response time, Server requests, and Availability.

Wrapping Up

Hopefully, this will help you get going with Application Insights. This post didn’t cover many of the features that Application Insights provides, but should get you set up so you can explore all the features the service provides.

Add Application Insights to an Existing ASP.NET Core Application Read More »

Deploy ASP.NET Core 3 Previews to Azure App Service

I have found some time to play around with some of the features coming with ASP.NET Core 3 and I needed a place to host some of the applications I’m playing around with. Azure App Services has always been a great place for this type of thing, but as you will see in the details below it doesn’t support ASP.NET Core 3 by default currently.

This post is going to walk through creating a new ASP.NET Core 3 React application and publishing it to a new App Service with the default setting and then show you what to change to get the application to run.

Sample Application

I used the following .NET CLI command to create a new ASP.NET Core application using React for its front end.

dotnet new react

After the creation process is complete open the project in Visual Studio. I highly recommend using the Visual Studio 2019 preview release when working with any .NET Core 3 applications.

Publish to App Service

In Visual Studio’s Solution Explorer right click on the project file and select Publish.

Select App Service for the publish target. Here we are creating a new app service. Next, click Publish.

The next dialog if the information about the new App Service that will be created. I took the defaults for the most part. I did create a new resource group for this application to make the resources easier to clean up in the future. I also changed the hosting plan to the free tier. Click Create to continue.

The Error and the Warning

As part of the publishing process, a browser will be opened to the address of the application. When this happens you will see an error about ANCM In-Process Handler Load Failure (if you are using IIS In-Process Hosting).

If you look back at Visual Studio you will see the following warning that your application requires the .NET Core runtime 3.0 and App Service only supports up to 2.2.

The Fix

After dismissing the dialog above you will see a summary of the publish profile we created above. Click the Pincel next to the Framework-Dependent value for Deployment Mode.

In the dialog that pops up set the Deployment Mode to Self-Contained and select an appropriate Target Runtime for your App Service. In the case of this sample which is deployed to a Windows App Service, we are using win-x86.

Back on the publish profile summary screen click the Publish button to redeploy the application to App Service with the new settings. When the process finishes this time you should see a browser load with your application running properly.

Wrapping Up

This is a great example of the power of being able to do self-contained deployments. If this option didn’t exist then we would have no option for running .NET Core 3 applications on App Service.

Deploy ASP.NET Core 3 Previews to Azure App Service Read More »