ASP.NET Core

Add Aurelia to an ASP.NET Core Project

In this post I am going to add a new project to the my existing ASP.NET Core Basics solution which can be found in this repository. The new project will be MVC 6  to which I will add in Aurelia. With both ASP.NET and Aurelia now being at RTM I thought this would be a good time to cover getting a new project setup.

Over time the ASP.NET Core Basics repo used in this post is going to be replacing my ASP.NET Core SPAs repo based on some feedback that having Aurelia and Angular 2 in the same project made it harder to see how each individual framework is setup.

Part 1 – Add Aurelia to an ASP.NET Core Project (This Post)
Part 2 – Aurelia with an ASP.NET Core API
Part 3 – Aurelia with an ASP.NET Core API: Modeling and Displaying Data in Aurelia
Part 4 – Aurelia with ASP.NET Core: Host Aurelia from a Controller
Github repo with the code for all of the parts with a release to go with each post

 Adding a new project to an existing solution

To add a new project to the existing solution right click on the solution and then click Add > New Project.

AddProjectExistingSolution

On the Add New Project dialog select ASP.NET Core Web Application (.NET Core), enter a name and then click OK.

AddNewProjectDialog

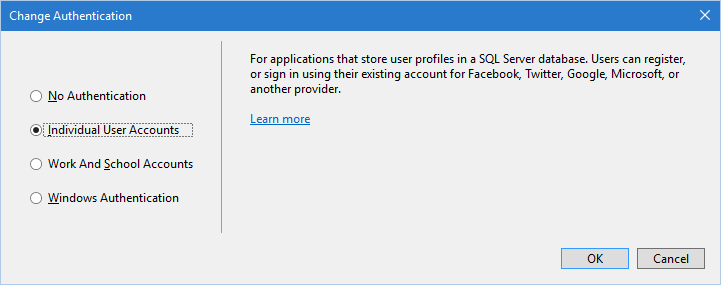
On the New ASP.NET Core Web Application (.NET Core) dialog select Web Application. This application doesn’t need authentication so leave it set to No Authentication. Finally click OK.

NewASPNetCoreWebApplication

After a few seconds the project creation will complete and the solution will contain two projects. The existing Contacts project that contains both a razor/normal implementation of a contacts list as well as an API implementation. The second project is the newly created Aurelia project.

SolutionWithTwoProjects

Changing the startup project

Notice in the screenshot above that the Contacts project is in bold. This means that the Contacts project is set as the startup project and it will be the project that starts when the application is run (F5 or Cntrl + F5). In this post we will just be working with the Aurelia project so we need to make it the startup project. To do this right click the Aurelia project and select Set as StartUp Project.

SetAsStartupProject

Now if you hit F5 the Aurelia project will run. Visual Studio provides a lot of flexibility around which projects start up. You can select a single, have which ever project you have to have select, or even multiple projects.  In a later post we will need both projects to start up and I will cover that when we have the need.

Install the Aurelia CLI

Make sure you have a minimum of NodeJs 4.x or above installed. If you need the installer it can be found here. After the install is complete open a command prompt and run the following command to install the Aurelia CLI.

npm install aurelia-cli -g

Add Aurelia to existing ASP.NET Core Project

In a command prompt navigate to the folder that contains the xproj file for the ASP.NET Core project created above. Now the Aurelia CLI can be used to setup a new Aurelia project at the current location using the following command.

au new --here

There will be a series of prompts the first of which is the selection of which platform to use. Select the option for ASP.NET Core (option 2). I used the defaults for most of the remaining prompts. The exception was for unit testing which I selected no on just to keep the project simpler not because I think testing is a bad idea.

When the Aurelia CLI finishes its file creation and dependency restore your project will contain the highlighted new files and folders.

auaddedfiels

Notice that I have a warning on Dependencies that something is not installed. There is a quirky issue with Visual Studio that Scott Hanselman has blogged about here. He goes in to a good bit of detail about what is going on as well as suggesting a work around. It has to do with npm and not being about to restore an optional package that isn’t meant for Windows machines.

gulp

The Aurelia CLI creates a set of tasks to help with building, transpiling the Aurelia part of the applications. I wrote a couple of posts over the couple few weeks dealing with converting a project to use glup as well as how to get gulp working with ES 2015.

I am going to cover the abbreviated version of those two post here. Add a new file called gulpfile.babel.js in the root of the project, where your project.json is located. The Aurelia CLI added all the needed items in the devDependencies section of package.json.

gulp no go

At this point I attempted to include the tasks under aurelia_project/tasks using require(‘require-dir’)(‘aurelia_project/tasks’);. This failed completely. I couldn’t get any of the items in the tasks folder to show up. I am not sure why this didn’t work. My best guess is that the tasks in the tasks folder are exporting gulp.series and not gulp.task. I just don’t know enough about gulp at this point to now how to fix/work around this or if what I am trying to do is just not the right way it should be used.

The gulp work around

I spent more time that I would have like working on getting gulp to pick up the items in the tasks folder, but I don’t want to have to run a CLI command every time I do a build to make sure all the Aurelia related files are up to date. As a work around I decided to add a gulp task to invoke the CLI command for me.

To start open package.json  and add the following to the devDependencies section which allows shell commands to be run from gulp.

"gulp-shell" :  "0.3.0"

Next in gulpfile.babel.js added the proper imports and created tasks for the CLI commands I wanted to run. In the case I am just showing the build command.

import gulp from 'gulp';
import shell from 'gulp-shell';

gulp.task('bulid', shell.task(['au build']));

Using the Task Runner Explorer this task can now be set to run after a build of the MVC project.

treafterbuild

This accomplishes what I wanted, but it feels like a hack. If anyone knows a better way please let me know.

It’s Alive!

At this point if you run the application it will go to the normal default home page that gets created by the Visual Studio template. For me that address is http://localhost:37472/. From there if you add index.html, the full address is http://localhost:37472/index.html, you will be invoking the Aurelia application.

At this point all you will see is “Hello World!”. Not that impressive I know, but it is a starting point that we will build on in future posts.

The associated code can be found here.

Add Aurelia to an ASP.NET Core Project Read More »

Unable to start process dotnet.exe

This morning I did a sync of a repo using of Visual Studio and then tried to run a web application I was going start working when I got this error:

Unable to start process C:\Program Files\dotnet\dotnet.exe. The web server request failed with status code 500, Internal Server Error. The full response has been written to C:\Users\ericl\AppData\Local\Temp\HttpFailure_11-01-57.html.

As directed by the error message I opened up the referenced html file. The file stated the requested page cannot be access because the related configuration data for the page is invalid. Along with the path to the configuration file. Here is a screen shot of the rendered file.

50019

I checked the config file referenced in the error message and I saw nothing wrong. It is the default generated file with no changes.

Since this project ran fine on another computer the day before I thought I would search for my profile name on from the other computer on the one having issues. This led me to the .vs/config folder found at the solution level of my application which contained the applicationhost.config file.

The solution

applicationhost.config has a lot of information in it, but the section I needed to change was under the sites tag. The physical path was set to the directory where the project was located on my other computer. I changed the path to match the path on my current computer and all worked fine. Not sure why this path isn’t relative one it exists within the solution. This is the line that I needed to change.

<virtualDirectory path="/" physicalPath="C:\Users\ericl\Source\Repos\ASP.NET Core Contacts\Contacts\src\Contacts" />

As an alternative it also works to close Visual Studio delete the whole .vs folder and reopen the project in Visual Studio. This causes the config file to regenerated with the proper values.

Looks like the .vs folder is in the default .gitignore file, but my project was missing the ignore file.

Unable to start process dotnet.exe Read More »

ASP.NET Core Basics: API Controller

This week’s post is going to cover the creation of an API controller. The starting point for this post is based on this post from last week and the starting state of the code can be found here.

Scaffolding

Using the same Contact model class from last week’s post Entity Framework Core’s scaffolding can be used to generate an API controller for us with all the read and write actions already written. To begin in the Solution Explorer window right click on the Controllers folder and select Add > New Scaffolded Item.

AddNewScaffoldedItemMenu

On the Add Scaffold dialog select API Controller with actions, using Entity Framework. This option will create an API controller with read and write actions based on a model.

AddScaffoldApi

On the Add Controller dialog for the model class select the Contact class, for the data context class select the existing ContactsContext. Finally enter the controller name you would like to use. I am using ContactsApiController since the MVC controller from last week’s post is already named ContactsController.

AddApiControllerDialog

Click add and the scaffolding process will create a ContactsApiController in the Controllers folder. With that the project now contains a fully functional contacts API that will handle gets, puts, posts and deletes with zero code changes.

Test with Postman

Postman is a great tool that I always use when developing an API that allows me to exercise all the functions of the API before any clients have been built. I know you can do some of the same things using a browser, but Postman was built for this type of usage and it shows. Postman is free and you can grab it from here as a Chrome app or they have app versions available here.

After installing the application and running it you will see something like the following.

PostmanBlank

It is best to have some data available for testing so in the case of this application I recommend using the UI added in last weeks post to add a couple of contacts.

Now that some data is available it is time to test the GetContact function on the ContactsApiController. If you run the application it should open in a browser from which you can copy the URL, or right click on the project select properties then on the Debug tab copy the URL from the App URL field.

ProjectProperties

Paste the base URL in the URL box in Postman and then add on the route for the endpoint you are wanting to test. In this case I want to test the the GetContact function on the ContactsApiController so I will be using the a URL of http://localhost:13322/api/contactsapi. Next make sure contact application is running and then click the send button in Postman. The application should respond and the results of the API call will be displayed on the body tab of Postman.

PostmanGetContacts

Postman can be used to try out pretty much all aspects of the API that an application has. For example if you wanted to test out the PostContact then in Postman click the down arrow next to Get and select Post. Next select the upper body tab (in the request area) and the click the raw radio button. Then to the right of the radio buttons hit the down arrow and select JSON (application/json) and then it the large text box you can enter the JSON that will be sent to the server when you click the send button. The following is an example of a post request.

PostmanPostContact

Wrapping Up

This application now has a fully functional API and we have covered how test it using Postman.

The next step would be to create some sort of client to actually utilized the API such as an Aurelia or Angular 2 application.

The code for this post can be found here.

ASP.NET Core Basics: API Controller Read More »

ASP.NET Core Basics: MVC Controller with Entity Framework Core

Last week’s post covered the installation and creation of a new project in ASP.NET Core. This week I will be expanding that existing project to create a basic contact list which will use Entity Framework Core and its scaffolding capabilities to generate the needed files from a model class. This code from last week is being used as a starting point for this post.

Add a Model

To start off I need a class to represent the information for a single contact. In the default setup the proper place to store this type of class is in the Models folder. To add a new class from the Solution Explorer window right click on the Models folder and select Add > Class menu option.

AddClassMenu

This menu choice will bring up the Add New Item dialog defaulted to adding a new class. Enter the name as Contact.cs and click Add.

AddNewItemDialogContact

The following is my resulting Contact after adding the properties of a contact that this application is going to use.

namespace Contacts.Models
{
    public class Contact
    {
        public int Id { get; set; }
        public string Name { get; set; }
        public string Address { get; set; }
        public string City { get; set; }
        public string State { get; set; }
        public string PostalCode { get; set; }
        public string Phone { get; set; }
        public string Email { get; set; }
    }
}

Scaffolding

Now that the application knows what a Contact looks like we can take advantage of a feature of Entity Framework Core called scaffolding. Scaffolding can be sued to create a number of different setups based on a model, but in this case it I am using it to generate a MVC Controller with views, using Entity Framework which will result in a controller, DbContext and associated MVC razor views being created.

In the Solution Explorer window right click on the Controllers folder and select Add > New Scaffolded Item.

AddNewScaffoldedItemMenu

On the Add Scaffold dialog select MVC Controller with views, using Entity Framework. This is the only option that will create views. Now click the Add button.

AddScaffoldDialog

The Add Controller dialog will be shown next. First select the model that should be the base of the scaffolding operation which is the Contact class for this project. For the data context class option I used the plus (+) button to add a new one since this project doesn’t have an existing data context that I want to use.

AddControllerDialog

After clicking add and letting the process finish the Controllers folder will now contain a ContactsController and in the Models folder there will be ContactsContext. I always move the newly created context out of the Models folder and into the Data folder to match the location used for the ApplicationDbContext.

Entity Framework Migration

Now that the application has a contact model and DbContext it is time to create an entity framework migration which is the mechanism entity framework uses to create and/or migrate a database to match the changes made in the models of an application. Migrations can be added within Visual Studio via the Package Manager Console or from a command prompt using the .NET CLI. I am going to walk through both, but keep in mind you only need to use one.

Package Manager Console

To open the Package Manager Console use the View > Other Windows > Package Manager Console menu. Which show a window that looks like the following.

PackageManagerConsole

To add a migration use run the Add-Migration Init-Contacts -Context ContactsContext command. The Package Manager Console is using powershell so Add-Migration is a command that take a parameter that is the name of the migration which is Init-Contacts in this case. -Context ContactsContext is required in this application because it contains more than one DbContext and the command has to know which DbContext it is working with.

.NET CLI

Open a command prompt and navigate to your project’s directory and then run the dotnet ef migrations add Init-Contacts –context ContactsContext command. This is does exactly the same thing as the Package Manager Console above with just slightly different syntax.

Regardless of which version is used you will see a new Migrations folder added to the root of the project that contains a snapshot of the models referenced by the relevant DbContext as well as a migration file named by using a time stamp plus the migration name.

Automatic Database Migration

In the early stages of a project (or always if it meets your need) it is nice to automatically apply migrations instead of having to do so manually using the package manager console or the .NET CLI. One way to accomplish this is to add a static flag to the constructor of the DbContext in question and if that flag is false then use Database.Migrate() to apply any migrations that the database is missing. Here is an example using my ContatsContext class with the flag named _created.

public sealed class ContactsContext : DbContext
{
    private static bool _created;
    public DbSet<Contact> Contact { get; set; }
    public ContactsContext(DbContextOptions<ContactsContext> options)
        : base(options)
    {
        if (_created) return;
        Database.Migrate();
        _created = true;
    }
}

Add Navigation

At this point you could type in a URL that would take you to the index action of the new ContactsController, but it would be much more useful to add a link to the sites navigation bar to provide an easy way to access the new functionality. The code for the navigation bar can be found in _Layout.cshtml which is located in the Views > Shared folder.

The navigation bar is defined using an unordered list with a class of “nav navbar-nav”. Add a new link to the unorderd list labeled Contact List. This new link needs to point to the index action of ContactsController. ASP.NET Core provides some tag helpers to assist in building links to controller actions. Using the asp-controller and specify “Contacts” as the controller which will resolve to the ContactsController and then use asp-action set to “Index” to point to the index action.

<ul class="nav navbar-nav">
    <li><a asp-area="" asp-controller="Home" asp-action="Index">Home</a></li>
    <li><a asp-area="" asp-controller="Contacts" asp-action="Index">Contact List</a></li>
    <li><a asp-area="" asp-controller="Home" asp-action="About">About</a></li>
    <li><a asp-area="" asp-controller="Home" asp-action="Contact">Contact</a></li>
</ul>

Wrapping Up

Now when the application is run there will be a link for Contact List at the top that will trigger actions in the new controller and backing database table.

Next week I play to take this same project and add a web API end point to it and show how that end point can be verified using Postman.

The code that goes with the post can be found here.

ASP.NET Core Basics: MVC Controller with Entity Framework Core Read More »

ASP.NET Core Basics: Project Creation

With ASP.NET Core released it seems like a good time to do a series of posts on the basics of this new platform starting with getting a new project up and running.  In this post I am going to walk through installation of ASP.NET Core and then move to project creation. This project will end up being a basic contact list application although there will not be much specific to that end goal in this post.

Installation

All the software needed for this post can be found at http://dot.net. I will be using Visual Studio 2015 in my examples and if you don’t have it installed already it can be downloaded using the Download Visual Studio 2015 button on the right of the above page or by clicking here. If you already have Visual Studio 2015 installed please ensure you have installed Update 3.

The next bit of software you will need is found by clicking the Download .NET Core 1.0 or clicking here. This page has a good write up getting started with .NET Core, but all you need is the install for .NET Core 1.0 for Visual Studio which can be found here.

To verify that .NET Core is installed open a command prompt and run dotnet –version which will print the current version of .NET Core you have installed. As of this writing this my version is 1.0.0-preview2-003121. While .NET Core its self has been officially released the tooling is still in preview which is why the version contains preview2-003121.

Project Creation

Launch Visual Studio and from the File > New menu select Project…

NewProject

This will load the New Project dialog. On the left side under Templates > Visual C# > .NET Core select ASP.NET Core Web Application (.Net Core) or you can use the search box in the upper right of the screen to search for “ASP.NET Core Web Application (.Net Core)”.

NewProjectDialogContacts

Next on the New ASP.NET Core Web Application dialog select Web Application. This option creates an application with example MVC Views (razor) and an example controller. Notice the note that this template can be used for RESTful HTTP services as well. Next click the Change Authentication button.

NewAspNetCoreWebApplication

For this example I am going to use Individual User Accounts. This option adds UI, models, controllers, etc. to allow registration and management of user accounts. Since the option needs a database to store account information it include Entity Framework Core. Click OK on the Change Authentication dialog and then click ON new web application dialog.

ChangeAuthentication

Project Overview

After the creation process is finished got to the Solution Explorer window and you will see a set up similar to the following.

SolutionExplorer

I am going to point out a few of the files and folder that are part of a newly created application. Fist is wwwroot which is where static files will be severed as long you are using the static files middleware.  This is where images, CSS and JavaScript should go.

appsettings.json is where you will find connection strings and logging settings by default. Your own settings can be added here as well.

project.json is where you will find all your project’s dependencies (using the NuGet UI or Package Manager console both write to this file), tools, frameworks, build options, runtime options, publish options and scripts are all defined. Thankfully this file has good support for intellisense if you decide to edit it manually. This file covers a lot, but for this introduction I am going to avoid digging into the specifics.

Startup.cs is the last file I want to call out. Its generated contents are fine for this example project, but it has a couple of functions you should be aware of. First ASP.NET Core comes with dependency injection built in and the ConfigureServices function is where items are registered with the built in container. The second function is Configure and this is the function where the HTTP request pipeline for your application is configured using various middleware.

Wrapping Up

At this point you have a web application that can be run (press F5 to run with the debugger attached or Ctrl + F5 to run without the debugger). With no code changes you now have a web application that has basic navigation, controllers, views and authentication.

With this series of post things are being kept intentionally short and focused on one or two main topics. Next week will build on this basic project by adding in the ability to manage contacts, using a new controller and associated razor view which will be persisted to a database using Entity Framework Core.

The code that goes with this post can be found in this GitHub repository.


ASP.NET Core Basics: Project Creation Read More »

Enable Scaffolding without Entity Framework in ASP.NET Core

Background

While working on a MVC 6 application backed by a web API application which resides in a separate project I found myself wanting a quick way to use a model as a base to generate a controller and associated CRUD razor views. If a project is using entity framework this is simple to accomplish, but since my project is using web API calls instead of entity framework scaffolding is unavailable. Instead of manually creating all the needed parts I decided to try and enable the scaffolding bits that are available in projects using entity framework.

Getting Started

The first step I took was to look at the project.json from an application using entity framework. This helped me identity the dependencies and tools that might be needed for the scaffolding process. The following are the new items from the dependencies section.

"Microsoft.VisualStudio.Web.CodeGeneration.Tools": {
  "version": "1.0.0-preview2-final",
  "type": "build"
},
"Microsoft.VisualStudio.Web.CodeGenerators.Mvc": {
  "version": "1.0.0-preview2-final",
  "type": "build"
}

And the new items from the tools section (spoiler Microsoft.VisualStudio.Web.CodeGenerators.Mvc isn’t actually needed).

"Microsoft.VisualStudio.Web.CodeGeneration.Tools": {
  "version": "1.0.0-preview2-final",
  "imports": [
    "portable-net45+win8"
  ]
},
"Microsoft.VisualStudio.Web.CodeGenerators.Mvc": {
  "version": "1.0.0-preview2-final",
  "type": "build"
}

Failed dotnet restore

With the above changes dotnet restore fails with this error:

Package Microsoft.Composition 1.0.27 is not compatible with netcoreapp1.0 (.NETCoreApp,Version=v1.0). Package Microsoft.Composition 1.0.27 supports: portable-net45+win8+wp8+wpa81 (.NETPortable,Version=v0.0,Profile=Profile259)
One or more packages are incompatible with .NETCoreApp,Version=v1.0.

I double checked that the entity framework project was using the same versions. It was indeed using the same versions, but its restore worked fine.

The fix

This is a known issue which can be found on github here. The issues is caused by Microsoft.VisualStudio.Web.CodeGenerators.Mvc in the tools sections which I finally found out is not actually needed to enable scaffolding. To be clear the only change needed in the tools section the addition of the following and Microsoft.VisualStudio.Web.CodeGenerators.Mvc is not needed.

"Microsoft.VisualStudio.Web.CodeGeneration.Tools": {
  "version": "1.0.0-preview2-final",
  "imports": [
    "portable-net45+win8"
  ]
}

Scaffolding

Right click the Controllers folder and select Add > Controllers… (this is the menu enabled by the changes above).

AddController

The above launches the Add Scaffold dialog. Here select “MVC Controller with views, using Entity Framework”. This is the only built in option that creates views. Since this project isn’t using entity framework it will require a little clean up, but it is still faster than creating the views manually.

AddScaffold

After clicking add you will see the following screen. Select the model class to be used during the scaffold. For the data context class click the plus (+) button and enter a name (don’t spend any time on the name the resulting file will be deleted in the next step. Finally enter a controller name and click Add.

AddScaffoldController

Cleaning up the scaffold

In the models folder delete the data context class that was created, TestContext in this case. The removal of the TestContext will cause errors in the TestController which can all be removed (the constructor and private field used to hold the context) and replaced with calls to whatever back end system you happen to be using in your application. Finally in the Startup class remove the last reference to the TestContext.

Wrapping up

That is all the changes that were required other than adding a reference to the test index page to the home page of the application. Not sure this is the most efficient method ever, but for me it is easyer than creating the razor pages myself manually. In the future I may do some digging and determine what is required to create my own scaffolding option.

Enable Scaffolding without Entity Framework in ASP.NET Core Read More »

Migration from ASP.NET Core RC2 to RTM

On June 27th .NET Core 1.0 RTM was released which include ASP.NET Core 1.0 and Entity Framework Core 1.0. The links are to the official Microsoft announcement blogs.

Installation

Install instructions can be found at http://dot.net using the Download .NET Core button in the bottom center of the page or use this link to go directly to the install directions. If you are using Visual Studio 2015 then update 3 must be installed before installing .NET Core for Visual Studio which includes the RTM bits plus preview 2 of the related tooling.

After both installers are complete open a command prompt and run the command dotnet –version and verify the version is 1.0.0-preview2-003121.

Global.json

Update the version in the sdk section.

{
  "projects": [ "src", "test" ],
  "sdk": {
    "version": "1.0.0-preview2-003121"
  }
}

Project.json

The following table can be used to find and replace a lot of the changes in this file.

RC2 RTM
1.0.0-rc2-3002702 1.0.0
1.0.0-rc2-final 1.0.0

The run time option for server GC was moved.

Before:
"runtimeOptions": {
  "gcServer": true
}

After:
"runtimeOptions": {
  "configProperties": {
    "System.GC.Server": true
  }
}

A new option is now included in the publish options for “Areas/**/Views”.

Before:
"publishOptions": {
  "include": [
    "wwwroot",
    "Views",
    "appsettings.json",
    "web.config"
  ]
}

After:
"publishOptions": {
  "include": [
    "wwwroot",
    "Views",
    "Areas/**/Views",
    "appsettings.json",
    "web.config"
  ]
}

Finally in the scripts section if you are not using NPM and Gulp then the following change should be made. It is my understanding the choice to remove NPM and Gulp by default was to speed up restores.

Before:
"scripts": {
  "prepublish": [ "npm install", "bower install", "gulp clean", "gulp min" ],
  "postpublish": [ "dotnet publish-iis --publish-folder %publish:OutputPath% --framework %publish:FullTargetFramework%" ]
}

After:
"scripts": {
  "prepublish": [ "bower install", "dotnet bundle" ],
  "postpublish": [ "dotnet publish-iis --publish-folder %publish:OutputPath% --framework %publish:FullTargetFramework%" ]
}

Here is the full file for reference with NPM left in.

{
  "userSecretsId": "YourSecretsId",

  "dependencies": {
    "Microsoft.NETCore.App": {
      "version": "1.0.0",
      "type": "platform"
    },
    "Microsoft.AspNetCore.Authentication.Cookies": "1.0.0",
    "Microsoft.AspNetCore.Diagnostics": "1.0.0",
    "Microsoft.AspNetCore.Diagnostics.EntityFrameworkCore": "1.0.0",
    "Microsoft.AspNetCore.Identity.EntityFrameworkCore": "1.0.0",
    "Microsoft.AspNetCore.Mvc": "1.0.0",
    "Microsoft.AspNetCore.Razor.Tools": {
      "version": "1.0.0-preview1-final",
      "type": "build"
    },
    "Microsoft.AspNetCore.Server.IISIntegration": "1.0.0",
    "Microsoft.AspNetCore.Server.Kestrel": "1.0.0",
    "Microsoft.AspNetCore.StaticFiles": "1.0.0",
    "Microsoft.EntityFrameworkCore.SqlServer": "1.0.0",
    "Microsoft.EntityFrameworkCore.Tools": {
      "version": "1.0.0-preview2-final",
      "type": "build"
    },
    "Microsoft.Extensions.Configuration.EnvironmentVariables": "1.0.0",
    "Microsoft.Extensions.Configuration.Json": "1.0.0",
    "Microsoft.Extensions.Configuration.UserSecrets": "1.0.0",
    "Microsoft.Extensions.Logging": "1.0.0",
    "Microsoft.Extensions.Logging.Console": "1.0.0",
    "Microsoft.Extensions.Logging.Debug": "1.0.0",
    "Microsoft.VisualStudio.Web.BrowserLink.Loader": "14.0.0",
    "Microsoft.VisualStudio.Web.CodeGeneration.Tools": {
      "version": "1.0.0-preview2-final",
      "type": "build"
    },
    "Microsoft.VisualStudio.Web.CodeGenerators.Mvc": {
      "version": "1.0.0-preview2-final",
      "type": "build"
    }
  },

  "tools": {
    "BundlerMinifier.Core": "2.0.238",
    "Microsoft.AspNetCore.Razor.Tools": "1.0.0-preview2-final",
    "Microsoft.AspNetCore.Server.IISIntegration.Tools": "1.0.0-preview2-final",
    "Microsoft.EntityFrameworkCore.Tools": "1.0.0-preview2-final",
    "Microsoft.Extensions.SecretManager.Tools": "1.0.0-preview2-final",
    "Microsoft.VisualStudio.Web.CodeGeneration.Tools": {
      "version": "1.0.0-preview2-final",
      "imports": [
        "portable-net45+win8"
      ]
    }
  },

  "frameworks": {
    "netcoreapp1.0": {
      "imports": [
        "dotnet5.6",
        "portable-net45+win8"
      ]
    }
  },

  "buildOptions": {
    "emitEntryPoint": true,
    "preserveCompilationContext": true
  },

  "runtimeOptions": {
    "configProperties": {
      "System.GC.Server": true
    }
  },

  "publishOptions": {
    "include": [
      "wwwroot",
      "Views",
      "Areas/**/Views",
      "appsettings.json",
      "web.config"
    ]
  },

  "scripts": {
    "prepublish": [ "npm install", "bower install", "gulp clean", "gulp min" ],
    "postpublish": [ "dotnet publish-iis --publish-folder %publish:OutputPath% --framework %publish:FullTargetFramework%" ]
  }
}

Breaking Changes

A list of breaking changes for this release can be found here. The only one I hit was this issue which changes the JSON serializes to use camel case names by default. To restore the previous behavior making the following change in the ConfigureServices function of the Startup class.

Before:
services.AddMvc();

After:
services.AddMvc()
        .AddJsonOptions(options => options.SerializerSettings.ContractResolver = new DefaultContractResolver());

Congratulations

Congratulations to .NET Core teams for hitting RTM! I know there has been some negative things said about the amount of churn in the RC phase of the project, but based on what I feel they made the right choice for the future of the platform. If you don’t already I highly recommend watching the ASP.NET Community Stand-up where you can see a lot of these issues discussed by the team.

In the next few of weeks the team should be releasing a road map of what they are going to be working on next such as SignalR.

Migration from ASP.NET Core RC2 to RTM Read More »

Migration from ASP.NET Core RC1 to RC 2

ASP.NET Core release candidate 2 was released on May 16. The announcement can be found here. One reason for there being so much time between RC 1 and RC 2 is the dnvm, dnx and dnu tool set that ASP.NET Core had been built upon has been replaced by the .NET CLI. To replace the underpinnings of a system at the RC stage is a big under taking, but it was an important step to keep the a consistent set of tools across .NET’s cross-platform offerings.

Installation

With this release Microsoft added http://dot.net to better centralize acquisition of .NET. For ASP.NET Core use the download .NET Core or use this link to go directly to the install directions. If you are using Visual Studio you can get the MSI install from here.

After the installer is complete open a command prompt and run the command dotnet –version to verify version 1.0.0-preview1-002702 is installed.

Global.json

Only change here is a version update with the new value matching the following.

{
  "projects": [ "src", "test" ],
  "sdk": {
    "version": "1.0.0-preview1-002702"
  }
}

Project.json

The changes to this file were so extensive I found it easy to crate a new web application and copy the details out of the new project instead of tried to deal with editing my existing file. The only thing I kept from the original was my userSecretsId. If you do go this route make sure you change the schema (drop down at the top of the editor) to http://json.schemastore.org/project. The following is my resulting file.

{
  "userSecretsId": "replace with your secrets Id",

  "dependencies": {
    "Microsoft.NETCore.App": {
      "version": "1.0.0-rc2-3002702",
      "type": "platform"
    },
    "Microsoft.AspNetCore.Authentication.Cookies": "1.0.0-rc2-final",
    "Microsoft.AspNetCore.Diagnostics": "1.0.0-rc2-final",
    "Microsoft.AspNetCore.Diagnostics.EntityFrameworkCore": "1.0.0-rc2-final",
    "Microsoft.AspNetCore.Identity.EntityFrameworkCore": "1.0.0-rc2-final",
    "Microsoft.AspNetCore.Mvc": "1.0.0-rc2-final",
    "Microsoft.AspNetCore.Razor.Tools": {
      "version": "1.0.0-preview1-final",
      "type": "build"
    },
    "Microsoft.AspNetCore.Server.IISIntegration": "1.0.0-rc2-final",
    "Microsoft.AspNetCore.Server.Kestrel": "1.0.0-rc2-final",
    "Microsoft.AspNetCore.StaticFiles": "1.0.0-rc2-final",
    "Microsoft.EntityFrameworkCore.SqlServer": "1.0.0-rc2-final",
    "Microsoft.EntityFrameworkCore.Tools": {
      "version": "1.0.0-preview1-final",
      "type": "build"
    },
    "Microsoft.Extensions.Configuration.EnvironmentVariables": "1.0.0-rc2-final",
    "Microsoft.Extensions.Configuration.Json": "1.0.0-rc2-final",
    "Microsoft.Extensions.Configuration.UserSecrets": "1.0.0-rc2-final",
    "Microsoft.Extensions.Logging": "1.0.0-rc2-final",
    "Microsoft.Extensions.Logging.Console": "1.0.0-rc2-final",
    "Microsoft.Extensions.Logging.Debug": "1.0.0-rc2-final",
    "Microsoft.VisualStudio.Web.BrowserLink.Loader": "14.0.0-rc2-final",
    "Microsoft.VisualStudio.Web.CodeGeneration.Tools": {
      "version": "1.0.0-preview1-final",
      "type": "build"
    },
    "Microsoft.VisualStudio.Web.CodeGenerators.Mvc": {
      "version": "1.0.0-preview1-final",
      "type": "build"
    }
  },

  "tools": {
    "Microsoft.AspNetCore.Razor.Tools": {
      "version": "1.0.0-preview1-final",
      "imports": "portable-net45+win8+dnxcore50"
    },
    "Microsoft.AspNetCore.Server.IISIntegration.Tools": {
      "version": "1.0.0-preview1-final",
      "imports": "portable-net45+win8+dnxcore50"
    },
    "Microsoft.EntityFrameworkCore.Tools": {
      "version": "1.0.0-preview1-final",
      "imports": [
        "portable-net45+win8+dnxcore50",
        "portable-net45+win8"
      ]
    },
    "Microsoft.Extensions.SecretManager.Tools": {
      "version": "1.0.0-preview1-final",
      "imports": "portable-net45+win8+dnxcore50"
    },
    "Microsoft.VisualStudio.Web.CodeGeneration.Tools": {
      "version": "1.0.0-preview1-final",
      "imports": [
        "portable-net45+win8+dnxcore50",
        "portable-net45+win8"
      ]
    }
  },

  "frameworks": {
    "netcoreapp1.0": {
      "imports": [
        "dotnet5.6",
        "dnxcore50",
        "portable-net45+win8"
      ]
    }
  },

  "buildOptions": {
    "emitEntryPoint": true,
    "preserveCompilationContext": true
  },

  "runtimeOptions": {
    "gcServer": true
  },

  "publishOptions": {
    "include": [
      "wwwroot",
      "Views",
      "appsettings.json",
      "web.config"
    ]
  },

  "scripts": {
    "prepublish": [ "npm install", "bower install", "gulp clean", "gulp min" ],
    "postpublish": [ "dotnet publish-iis --publish-folder %publish:OutputPath% --framework %publish:FullTargetFramework%" ]
  }
}

Namespace changes

The following are the namespace changes I hit. There is a pattern so if you hit any listed here it you should be able to make a good guess at what the new name is with AspNet going to AspNetCore and EntityFramework going to EntityFrameworkCore being the most common changes.

Old Namespace New Namespace
Microsoft.AspNet.Http.Authentication Microsoft.AspNetCore.Http.Authentication
Microsoft.AspNet.Authorization Microsoft.AspNetCore.Authorization
Microsoft.AspNet.Builder Microsoft.AspNetCore.Builder
Microsoft.AspNet.Identity Microsoft.AspNetCore.Identity
Microsoft.AspNet.Identity.EntityFramework Microsoft.AspNetCore.Identity.EntityFrameworkCore
Microsoft.AspNet.Hosting Microsoft.AspNetCore.Hosting
Microsoft.AspNet.Http Microsoft.AspNetCore.Http
Microsoft.AspNet.Http.Authentication Microsoft.AspNetCore.Http.Authentication
Microsoft.AspNet.Mvc Microsoft.AspNetCore.Mvc
Microsoft.AspNet.Mvc.TagHelpers Microsoft.AspNetCore.Mvc.TagHelpers
Microsoft.AspNet.Mvc.Rendering Microsoft.AspNetCore.Mvc.Rendering
Microsoft.Data.Entity Microsoft.EntityFrameworkCore
Microsoft.EntityFrameworkCore.Metadata.Internal
Microsoft.Data.Entity.Infrastructure Microsoft.EntityFrameworkCore.Infrastructure
Microsoft.Data.Entity.Metadata Microsoft.EntityFrameworkCore.Metadata
Microsoft.Data.Entity.Migrations Microsoft.EntityFrameworkCore.Migrations
System.Security.Claims Microsoft.AspNetCore.Identity

Application Entry Point

With the change to the CLI the Main function that was in the StartUp class is no longer sufficient. Using a new project as an example I removed Main from the StartUp and added a new Program class with that now contains the Main function for the application.

using System.IO;
using Microsoft.AspNetCore.Hosting;

namespace ASP.NET_Core_SPAs
{
    public class Program
    {
        public static void Main(string[] args)
        {
            var host = new WebHostBuilder()
                .UseKestrel()
                .UseContentRoot(Directory.GetCurrentDirectory())
                .UseIISIntegration()
                .UseStartup<Startup>()
                .Build();

            host.Run();
        }
    }
}

It is my understanding that all of the above was happening in the previous versions it has just now been made explicit.

StartUp Class

The StartUp had the second most changes after project.json. First as mention above the Main function was deleted. Next in the Startup function a call needs to be made to set the base path on the configuration builder. I missed the new SetBasePath(env.ContentRootPath) call at first and it caused an exception when builder.AddUserSecrets() was called.

Before:
var builder = new ConfigurationBuilder()
    .AddJsonFile("appsettings.json")
    .AddJsonFile($"appsettings.{env.EnvironmentName}.json", optional: true);

After:
var builder = new ConfigurationBuilder()
    .SetBasePath(env.ContentRootPath)
    .AddJsonFile("appsettings.json")
    .AddJsonFile($"appsettings.{env.EnvironmentName}.json", optional: true);

Next in the ConfigureServices function the need to add entity framework and add SQL server is now gone. Also notice that the retrieval of the connection string has changed as well.

Before:
services.AddEntityFramework()
    .AddSqlServer()
    .AddDbContext<ApplicationDbContext>(options =>
        options.UseSqlServer(Configuration["Data:DefaultConnection:ConnectionString"]))
    .AddDbContext<ContactsDbContext>(options =>
        options.UseSqlServer(Configuration["Data:DefaultConnection:ConnectionString"]));

After:
services.AddDbContext<ApplicationDbContext>(options =>
    options.UseSqlServer(Configuration.GetConnectionString("DefaultConnection")));
services.AddDbContext<ContactsDbContext>(options =>
    options.UseSqlServer(Configuration.GetConnectionString("DefaultConnection")));

Finally in the Configure function the following should be removed as it is now handled via the UseIISIntegration() call in the application’s Main function.

app.UseIISPlatformHandler(options => options.AuthenticationDescriptions.Clear());

Appsettings.json

The first change in appsettings.json is for the connection string settings mention above.

Before:
"Data": {
     "DefaultConnection": {
       "ConnectionString": "your connection string"
     }
}

After:
"ConnectionStrings": {
    "DefaultConnection": "your connection string"
}

Then the default logging level was changed from verbose to debug.

Before:
"Logging": {
    "IncludeScopes": false,
    "LogLevel": {
      "Default": "Verbose",
      "System": "Information",
      "Microsoft": "Information"
    }
}

After:
"Logging": {
    "IncludeScopes": false,
    "LogLevel": {
      "Default": "Debug",
      "System": "Information",
      "Microsoft": "Information"
    }
}

Misc Changes in Various Controllers

The return values for HTTP statuses changed by dropping the Http prefix. The following are a few examples.

Old New
HttpBadRequest BadRequest
HttpNotFound NotFound
new HttpStatusCodeResult(StatusCodes.Status409Conflict) new StatusCodeResult(StatusCodes.Status409Conflict)

Getting access to the user ID form the current context now requires access to an instance of the UserManager class which needs to be injected via the constructor.

private readonly ContactsDbContext _context;
private readonly UserManager<ApplicationUser> _userManager;
  
public ContactsApiController(UserManager<ApplicationUser> userManager, 
                             ContactsDbContext context)
{
    _userManager = userManager;
    _context = context;
}

The following shows the difference in usage before and after the update.

Before:
return _context.Contacts.Where(c => c.UserId == User.GetUserId());

After:
return _context.Contacts.Where(c => c.UserId == _userManager.GetUserId(User));

More user ID related changes.

Before:
_userManager.FindByIdAsync(HttpContext.User.GetUserId())

After:
_userManager.GetUserAsync(HttpContext.User)

External principal is now just principal.

Before:
var email = info.ExternalPrincipal.FindFirstValue(ClaimTypes.Email);

After:
var email = info.Principal.FindFirstValue(ClaimTypes.Email);

Is signed in moved from user to the sign in manager.

Before:
User.IsSignedIn()

After:
_signInManager.IsSignedIn(User))

Validation Summary

The validation summary tag helper drop the ValidationSummary prefix.

Before:
<div asp-validation-summary="ValidationSummary.All" class="text-danger"></div>

After:
<div asp-validation-summary="All" class="text-danger"></div>

This of course applies to all usages of the validation summary tag helper not just the all case.

Entity Framework

The constructor of a child of DbContext should now accept options.

Before:
public ContactsDbContext()

After:
public ContactsDbContext(DbContextOptions<ContactsDbContext> options)
    : base(options)

There were changes to how tables get named with this version and if you try to run with out the following code entity framework will be unable to locate your tables. By adding the following to OnModelCreating your models will be force back to the naming scheme from RC1.

foreach (var entity in builder.Model.GetEntityTypes())
{
    entity.Relational().TableName = entity.DisplayName();
}

Other Resources

The above should get your project up and running. The changes I have covered here have been posted to my SPA sample application which can be found here and all the change I made are in this commit which should prove useful if I missed anything. During my migration a newly crated project proved to be my greatest resource.

Microsoft provided the following three migrations posts which are also very helpful.

There are also a number of people in the communitity that have also posted guides such as:

Migration from ASP.NET Core RC1 to RC 2 Read More »

Migration from Angular 2 Betas to RC

On May 2nd Angular 2 moved from the beta stage to the release candidate stage and is currently on RC 1. The move from beta to RC was a bit more involved than the moves between beta. This post is going to cover the changes I went through to get my SPA sample application migrated to RC 1.

Update package.json

With this release Angular 2 was split from a single dependency in to multiple. The other big change is a rename of from angular2  to @angular. The following is my updated dependencies section.

"dependencies": {
  "@angular/common": "2.0.0-rc.1",
  "@angular/compiler": "2.0.0-rc.1",
  "@angular/core": "2.0.0-rc.1",
  "@angular/http": "2.0.0-rc.1",
  "@angular/platform-browser": "2.0.0-rc.1",
  "@angular/platform-browser-dynamic": "2.0.0-rc.1",
  "@angular/router": "2.0.0-rc.1",
  "@angular/router-deprecated": "2.0.0-rc.1",
  "@angular/upgrade": "2.0.0-rc.1",

  "systemjs": "0.19.27",
  "es6-shim": "^0.35.0",
  "reflect-metadata": "^0.1.3",
  "rxjs": "5.0.0-beta.6",
  "zone.js": "^0.6.12"
}

After the above change make sure to run npm install in the root of the project from a command prompt. Not sure if it was just me, but the dependency auto restore in Visual Studio wouldn’t work for the @angular dependencies.

Update gulpfile.js

Due to the changes in the dependency structure my gulpfile had to be updated to copy the new files to the proper locations. I took the opportunity to move all of my dependency to a lib folder.

gulp.task("angular2:moveLibs", function () {
    return gulp.src([
            "node_modules/@angular/common/**/*",
            "node_modules/@angular/compiler/**/*",
            "node_modules/@angular/core/**/*",
            "node_modules/@angular/http/**/*",
            "node_modules/@angular/platform-browser/**/*",
            "node_modules/@angular/platform-browser-dynamic/**/*",
            "node_modules/@angular/router/**/*",
            "node_modules/@angular/router-deprecated/**/*",
            "node_modules/@angular/upgrade/**/*",
            "node_modules/systemjs/dist/system.src.js",
            "node_modules/systemjs/dist/system-polyfills.js",
            "node_modules/rxjs/**/*",
            "node_modules/es6-shim/es6-shim.min.js",
            "node_modules/zone.js/dist/zone.js",
            "node_modules/reflect-metadata/Reflect.js"
    ],
        { base: "node_modules" })
        .pipe(gulp.dest(paths.webroot + "Angular/lib"));

});

If you were using the previous version of my gulp take make sure to remove the old dependencies from the wwwroot/Angular/ folder.

Update Entry Point View

Again because of the dependency changes the entry point view for the Angular 2 application needed changes which is Angular2.cshtml in my project. A systemjs.config.js was added to handle the bulk of the configuration. The following is the full source for my entry point view.

<html>
  <head>
      <title>Angular 2 QuickStart</title>

      <script src="~/Angular/lib/es6-shim/es6-shim.min.js"></script>
      <script src="~/Angular/lib/zone.js/dist/zone.js"></script>
      <script src="~/Angular/lib/reflect-metadata/Reflect.js"></script>
      <script src="~/Angular/lib/systemjs/dist/system.src.js"></script>

      <script src="~/Angular/app/systemjs.config.js"></script>
      <script>
          System.import('app').catch(function(err){ console.error(err); });
      </script>
  </head>

  <body>
      <my-app>Loading...</my-app>
  </body>
</html>

Add system.config.js

This new file is where the configuration of systemjs happens. I found this setup in Dan Wahlin’s Angular2-JumpStart project which can be found here. The only real changes I made from Dan’s file was to adjust the map section to match my folder layout.

(function (global) {

    // map tells the System loader where to look for things
    var map = {
        'app': '../Angular/app', 
        'rxjs': '../Angular/lib/rxjs',
        '@angular': '../Angular/lib/@angular'
    };

    // packages tells the System loader how to load when no filename and/or no extension
    var packages = {
        'app': { main: 'boot.js', defaultExtension: 'js' },
        'rxjs': { defaultExtension: 'js' }
    };

    var packageNames = [
      '@angular/common',
      '@angular/compiler',
      '@angular/core',
      '@angular/http',
      '@angular/platform-browser',
      '@angular/platform-browser-dynamic',
      '@angular/router',
      '@angular/router-deprecated',
      '@angular/testing',
      '@angular/upgrade'
    ];

    // add package entries for angular packages in the form '@angular/common': { main: 'index.js', defaultExtension: 'js' }
    packageNames.forEach(function (pkgName) {
        packages[pkgName] = { main: 'index.js', defaultExtension: 'js' };
    });

    var config = {
        map: map,
        packages: packages
    }

    // filterSystemConfig - index.html's chance to modify config before we register it.
    if (global.filterSystemConfig) { global.filterSystemConfig(config); }

    System.config(config);

})(this);

Update Component Imports

With the change in package names all imports that were using angular2 need to be changed to @angular. The following is an example of this from my app.component.ts file.

Before:
import {Component} from 'angular2/core';
import {OnInit} from 'angular2/core';
import {HTTP_PROVIDERS} from 'angular2/http';

After:
import {Component} from '@angular/core';
import {OnInit} from '@angular/core';
import {HTTP_PROVIDERS} from '@angular/http';

NgFor Change

There was also a slight syntax change around ngFor that changes the name declaration of the current item in the iteration of a loop. The following shows the before and after.

Before:
*ngFor="#contact of contacts"

After:
*ngFor="let contact of contacts"

Complete

With the above changes my application was run able again. The hardest part of the upgrade for me was getting systemjs configured properly. Hope your upgrade goes smooth and if not leave a comment with what issues you had.

Migration from Angular 2 Betas to RC Read More »

ASP.NET Core User Options and Custom Validators

Last week’s post looked at ASP.NET Core’s password options and custom validators and this week I am going to cover the built-in user options as well as writing custom user validators.

User Options

Just as last week I am going to start off showing the default registration of identity with ASP.NET Core’s built in dependency injection which is found in the ConfigureServices function of the Startup class.

services.AddIdentity<ApplicationUser, IdentityRole>()
    .AddEntityFrameworkStores<ApplicationDbContext>()
    .AddDefaultTokenProviders();

Using the same overload of  AddIdentity  as last week which accepts an IdentityOptions there are two built-in user options for AllowedUserNameCharacters and RequireUniqueEmail. The following example shows both options.

services.AddIdentity<ApplicationUser, IdentityRole>(options =>
{
     options.User.AllowedUserNameCharacters = "abcom@.";
     options.User.RequireUniqueEmail = true;
})
    .AddEntityFrameworkStores<ApplicationDbContext>()
    .AddDefaultTokenProviders();

When using AllowedUserNameCharacters make sure to include all the characters needed to make up a valid email address. My first test I left out the @ symbol and couldn’t create an account.

Custom User Validtors

The above built-in user validation options are pretty limited, but this just reflects that validation on users has standardized on email addresses for the most part. In the case that you require more specialized user validation the AddUserValidator extension to IdentityBuilder can be used in the AddIdentity chain to add custom validation based on the IUserValidator interface.

The only function on this interface is ValidateAsync. The following is an example user validator that limits users to a specific set of domains. For this example the domains are part of the validator class, but if this is something actually needed I would recommend storing the domains in a different way such as in a database or configuration.

public class UserDomainValidator<TUser> : IUserValidator<TUser> 
       where TUser : IdentityUser
{
    private readonly List<string> _allowedDomains = new List<string>
    {
        "elanderson.net",
        "test.com"
    };

    public Task<IdentityResult> ValidateAsync(UserManager<TUser> manager, 
                                              TUser user)
    {
        if (_allowedDomains.Any(allowed => 
               user.Email.EndsWith(allowed, StringComparison.CurrentCultureIgnoreCase)))
        {
            return Task.FromResult(IdentityResult.Success);
        }

        return Task.FromResult(
                 IdentityResult.Failed(new IdentityError
                 {
                     Code = "InvalidDomain",
                     Description = "Domain is invalid."
                 }));
    }
}

If the user’s email address doesn’t end with one of the domains in _allowedDomains the user will fail validation and the reason will be added to the list of identity validation errors which end up being show to the user. This validation is on the server side.

The following is what identity registration looks like with the user options and custom user validation.

services.AddIdentity<ApplicationUser, IdentityRole>(options =>
{
    options.User.AllowedUserNameCharacters = "abccom.";
    options.User.RequireUniqueEmail = true;
})
    .AddEntityFrameworkStores<ApplicationDbContext>()
    .AddDefaultTokenProviders()
    .AddUserValidator<UserDomainValidator<ApplicationUser>>();

Wrapping Up

Following the above you can see how easy it to add any custom user validation that might be needed. It is also nice that adding custom validation on user and passwords are very similar.

ASP.NET Core User Options and Custom Validators Read More »